
Creating Forms
Forms can be used for all sorts of input from visitors to your site; a few examples are registration for programs, suggestions for item purchases, and reference questions.
Install the plugin
Find a plug-in that provides the functionalities you need – I’m using “Form Maker” by http://web-dorado.com/. Go to your WordPress Plugins page and click Add New. Do a quick search for ‘form maker’, and once you find it, it’s just a one-click install! After activating it, you’ll see a new entry on your sidebar menu:
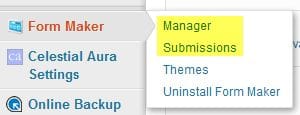
Form Maker menu
You will also see a couple of new items on your post and page edit screens:

New toolbar icons
Design your form
This plugin comes with a number of templates for different kinds of forms. If one of these generally fits your needs, simply open it and edit the fields, then save it with its own title. Or create your own form from scratch, using whatever types of fields suit your purposes. This plugin has a nice variety of options, but you need to know how they are different so you can make sure your form does what you want it to do.
Before creating your form, think carefully about its purpose and about what information you need! Bad form design (such as requiring a field, then not giving users an option that applies to them) can annoy the people you want to reach.
You need to know that the free version has a couple of limitations. Your form can only contain seven fields, and the file upload and map functions are not available.
Start at the Form Maker > Manager > Add a Form. Give it a title and enter the destination email address.
 Then add your first field! Choose the type you want from the from the panel shown below and click its button to customize and save it.
 This plugin’s ‘Text input’ has a number of pre-formatted options, such as name, phone number, email address, and others. You can also just create a blank text field to let respondents type comments or questions.
Drop-down ‘Select’ fields provide a specific responses from which the user selects one (without having to type anything).
A ‘Radio button’ is similar to the ‘Select’ field in that only one item can be chosen. If this will be a required field, consider adding an option of ‘Other’, followed by a free-text field for an explanation.
A ‘Checkbox’ field lets the user choose any number of the listed options.
‘Captcha’ is that quirky-text field that you have to decipher and retype before submitting an online form. Its purpose is to prevent automated responses, verifying that an actual person was on the other end.
When you are finished creating your form, don’t forget to add the ‘Submit’ button!
You will also need to specify what will display after submitting the form.
Publish
Add the form to a post or page using the ‘Insert Form Maker’ icon on the page or post toolbar (see above). After you publish the post or page with your form, all submissions will not only go to the email address you entered, but will also be listed in the Form Maker Submissions area in your WordPress admin back end.
Here’s the sample form I created, so you can see exactly how it displays in a post.
[Form id=”11″]
Alternatively, click the ‘Add Contact Form’ button to quickly create a form while you are writing a post:
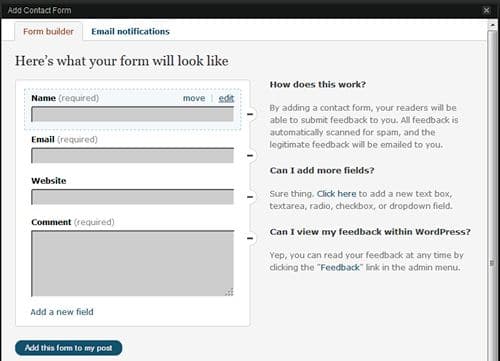
Add a basic form while writing a post